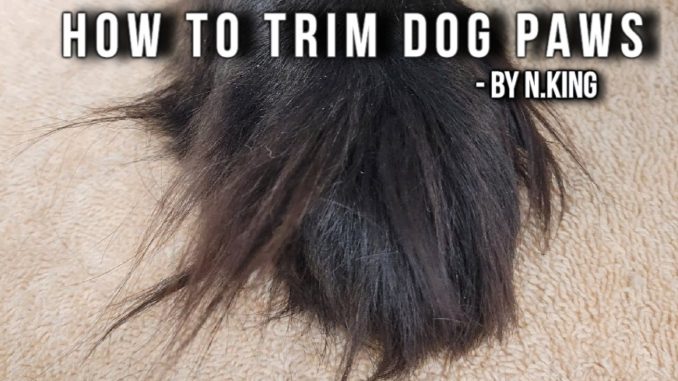
Grinch feet and Hobbit toes are just a few names for the furriest of feet. Fortunately, dog paws are fairly easy to trim to keep them in check.
For this step-by-step guide, you will need:
- A pair of curved scissors
- A pair of thinning shears
- A slicker brush
- Groomer clippers with a #10 blade (optional for shaving paw pads)
If you don’t have some of these tools, this article will explain some alternative ways to trim dog paws.
PRO TIP: Many groomers and vets offer touch up services – such as trimming between the eyes, sanitary shaves or paw pad shaving. This is a safe option if you are struggling to trim your dog’s feet.
Before learning how to trim dog paws, have treats ready to keep the experience positive.
Step 1 : Restrain your dog in a standing position
To avoid injuring your dog with grooming scissors, have someone safely restrain your dog.
PRO TIP: Restraining the dog in the standing position is the most common restraint method. In this method, the restrainer wraps one arm snugly under the dog’s neck and the other arm tucked under its abdomen. From here, the dog’s body is pulled against the restrainer’s body for added support and control. This controls the head and body from any sudden movement.
Step 2: Use a slicker brush to fluff up the hair
A hard or soft slicker brush works just as well for this step.
PRO TIP: I recommend using a small curved slicker. It is ergonomically designed and it contours the shape of the paw.
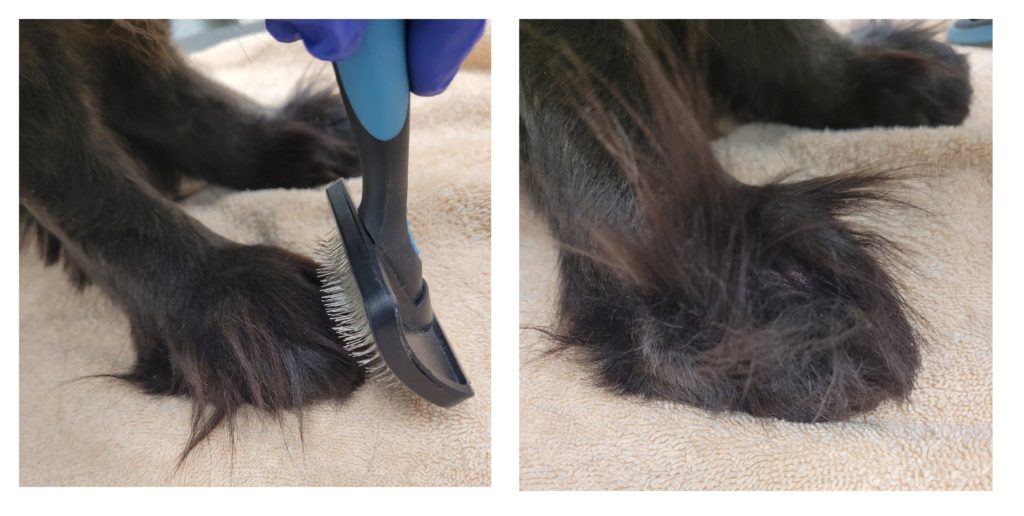
The slicker brush has many fine metal teeth that easily catches hair between each toe. Brush upwards against the top of the paw. Generally, I brush up against the paw about 2 to 3 times.
If you don’t have a slicker brush, you can use your fingers and lift up the excess hair between each toe.
As an example, the photo below shows how the hair should fluff up between each toe.
Step 3: Use curved scissors to trim the raised hair
Use curved scissors to trim each raised section of hair between each toe. You will notice how the curved scissors contours the shape of the paw.
If you don’t have curved scissors, then straight scissors can also get the job done. However, straight scissors do not contour to the shape of the paw, so just be careful to avoid accidental nicks to the foot.
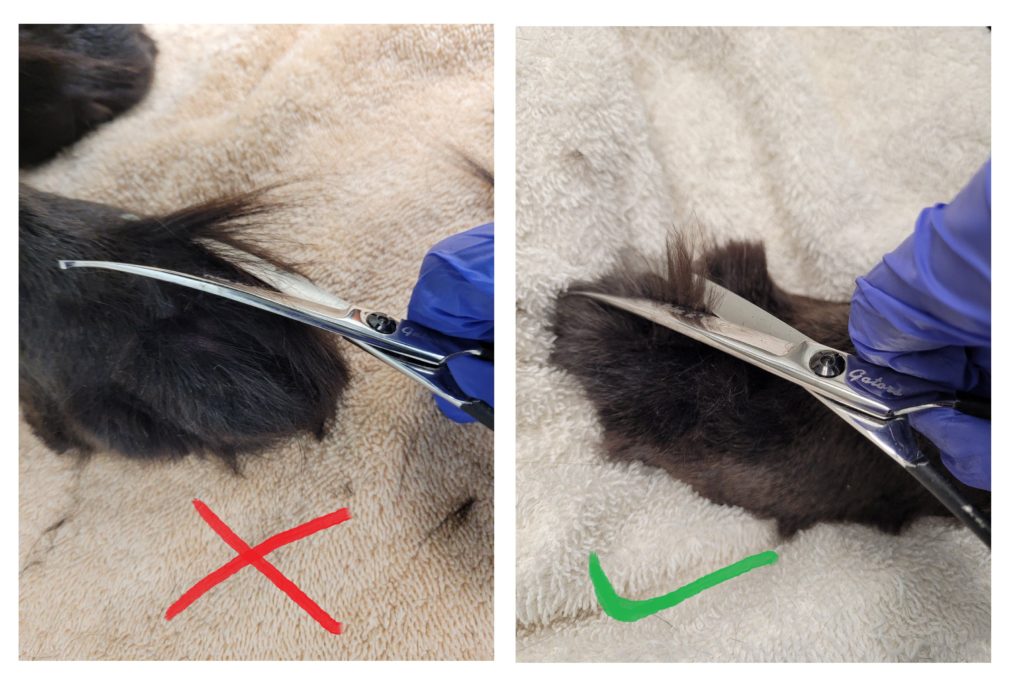
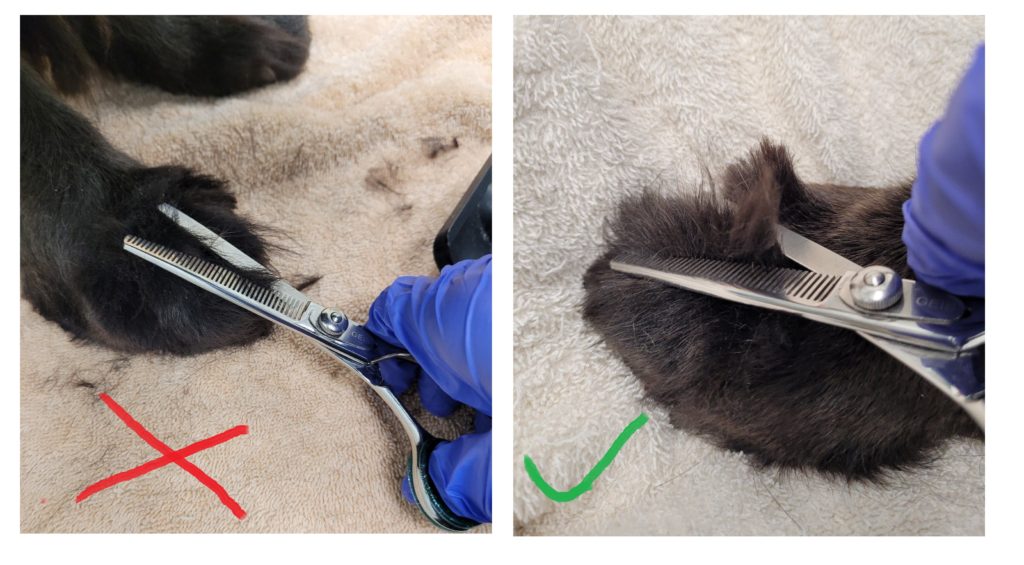
PRO TIP: As a safety tip , make sure to aim your scissors away from foot. If you are holding your scissors towards the foot, an injury can happen if the dog moves forward.
As an example, the photos below show the correct and incorrect way to angle your scissors. In addition, make sure to get ball-pointed scissors – it blunts the edge of the scissors to avoid any stabbing injuries.
PRO TIP: If your dog keeps lifting its foot as you trim. A trick is to use your left hand and slightly hold up the foot beside the one you are trimming. This will force the dog to keep its weight on the foot being trimmed.
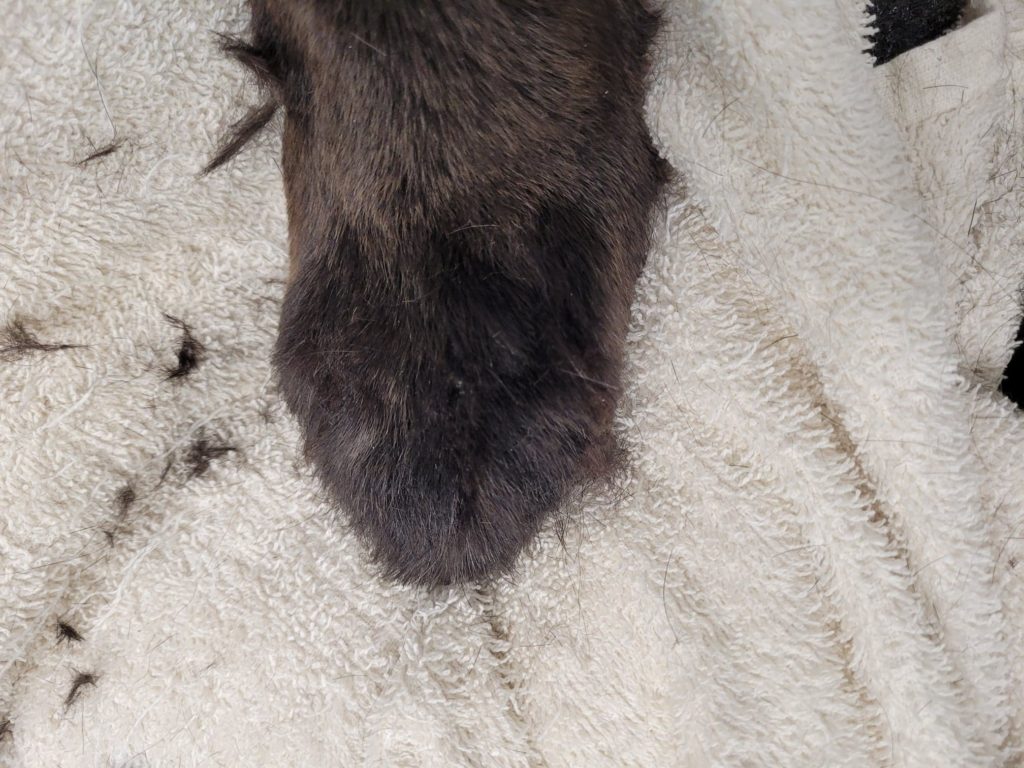
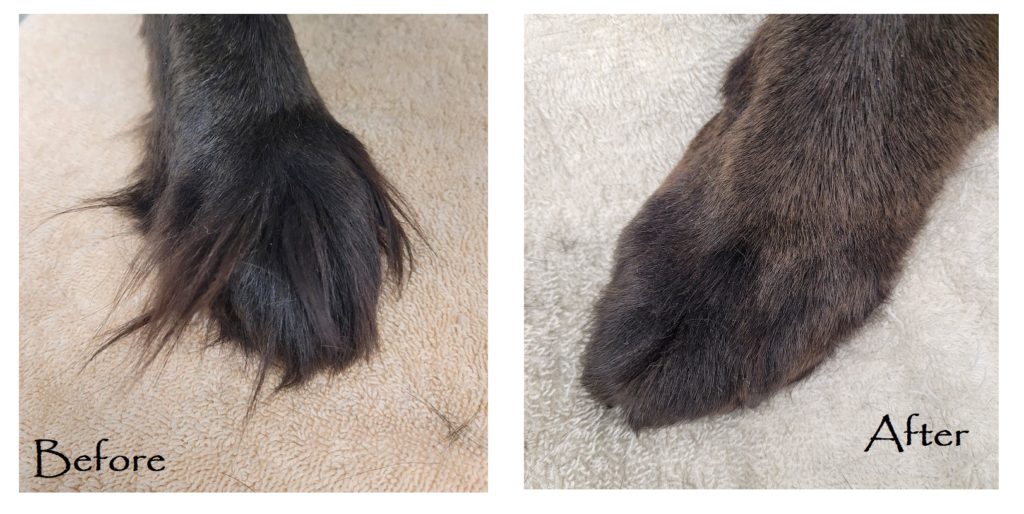
After trimming the excess hair, the paw will look neater. However, there may be chop marks and a few tufts of stray hairs. For example, the photo below illustrates this:
Step 4: Use the slicker brush again
After trimming the raised sections of hair between each toe, you may notice harsh chop marks. To achieve a natural furnished look to the trimmed feet, use the slicker brush to brush up against the paw. This will also catch any tiny excess hairs you may have missed.
After brushing up against the paw, small raised sections of hair may be seen between each toe.
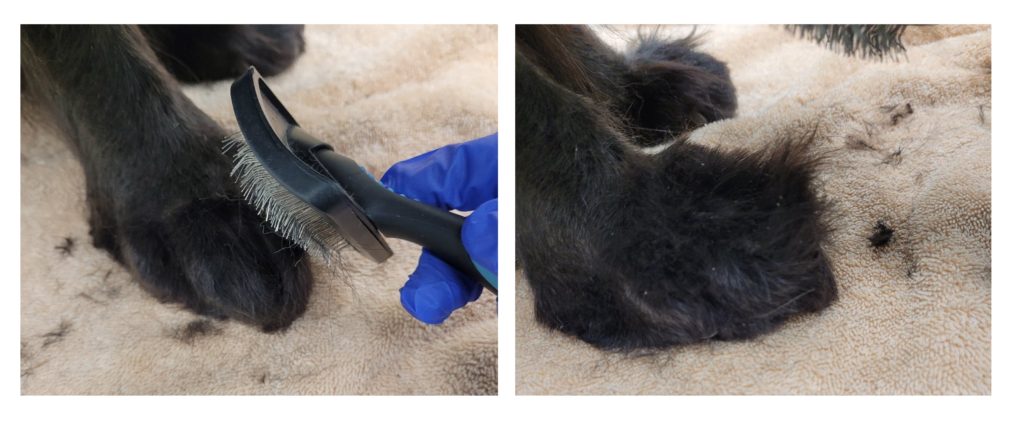
Step 5: Use thinning shears to furnish the look
Use a pair of thinning shears to trim each section of raised hair between each toe. This will help trim down extra hair and achieve a texturized natural look to your dog’s feet.
Sep 6: Trim excess hair around the paw
Secure the foot in your left hand before trimming excess hair. Use curved shears to trace around the paw to trim away excess hair.
Step 7: Shaving the paw pad
For home grooming, I recommend using a #10 blade. For groomers, I recommend a #40 blade – a close shaving blade.
Please be advised that for home grooming, a #10 blade leaves the hair at 1/16 of an inch – therefore, it will not cut into skin.
A #40 blade is a surgical shaving blade and can easily cut into the skin if not handled professionally. For home groomers, a #10 blade will give you piece of mind that the edge has enough of a guard to protect the skin.
When you have the # 10 blade attached to the clippers, make sure to secure the paw in your left hand. Your fingers should wrap snugly around the foot as the paw is lifted upward to face you.
The correct technique to shave the pad involves using a scooping motion with the blade. This is similar to scooping out ice cream with a spoon.
PRO TIP: However, the blade should never dig into the pad – this can lead to nicks if done with force. If you are nervous about scooping into the paw pads, you can keep the blade flat against the pad and only shave what has grown beyond the pad.
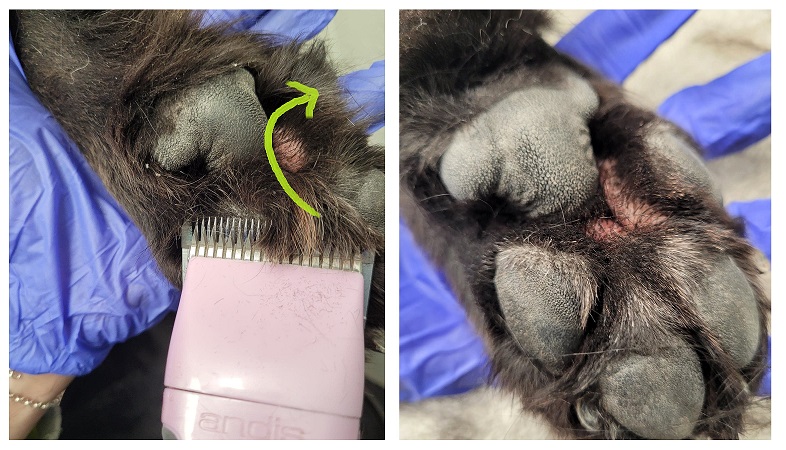
Your groomer or vet can help shave more deeply when its time for your pet’s next visit.
-By Nikita King, Certified Pet Groomer
After learning how to trim dog paws, check out these other useful guides on how to stop shedding, how to cut your dog’s nails and how often:
How do I stop a dog from shedding?
